Category: Home Improvement

  • House for Sale

    Our house is on the market and we had a photographer come out and take pictures for a “virtual tour”. There are lots of good shots, but there’s no cool rotate-around-360-degrees stuff until the end of the slide show.

    http://vt.realtour.biz/?P=44233

    (Please excuse the cheesy music.)

  • Huge Landscaping Project

    This is a project we’ve planned for years. There is an area in the front yard where several trees produce enough shade that bermuda grass won’t grow. Whenever I mow the weeds and undesirable grass that does grow there, it is always a dust storm. Finally we have gotten this project underway. We have created a stone border around the shaded area (Thanks for the help, Bobby!), placed several limestone boulders about (Thanks TJ!), and planted several dozen decorative plants (Thanks Tristan, Junior, Leigh, and Dave’s tractor!). Finally we covered the whole thing in with red mulch to match the landscaping in front of the house (Thanks Erick!). More photos are available in the gallery.

    Another angle of the new bordered area, after the Roundup has started killing everything View of the new flower garden from the dry creek bed-1 View of the new flower garden from the existing flower garden

  • Spring Flood

    The aftermath of a huge downpour.Soon after I completed Phase 1 of the Dry Creek Bed, we got an incredible amount of rain incredibly quickly. I saw reports of between 6 and 8 inches in just a few hours.

    Water was filling all the ditches, rushing over the road, and washing my carefully placed river rock down to the very back of my property. Scariest of all is that the front yard was so flooded, that water rose onto our porch, coming right up to the front door threshold.

    So not only do I have to do a lot of reworking of the creek, but I now plan to do some excavating to make the front yard drain better, to avoid the possibility of the house getting flooded if we ever have huge torrents of rain like that again.

  • Dry Creek Bed Phase 1

    Dry creek bed from the topSpring Break means another huge landscaping project. This year, we put in a 200 foot long dry creek bed. We are at the lowest point on the road, and we’ve had a problem with water draining through places we don’t want it to. We’ve finally decided to show nature who’s boss and route the water where we want it to go. This involved raising a low area, and more importantly, digging a trench. Luckily I was able to borrow a Bobcat skid-steer loader early in the project to get the basic shape of the trench started. This was incredibly helpful to getting the project going, and since I had never driven one before, it was also a rather fun learning experience.

    I was also able to borrow a neighbor’s excellent Kubota tractor, which included a front loader and a box blade. This allowed me to complete the trench and was also instrumental in hauling and spreading the “river rock” gravel base and Brazos cobble stone top layer.

    Digging the trench Trench dirt used for fill The topsoil has been spread

  • The Fruits of our Labor

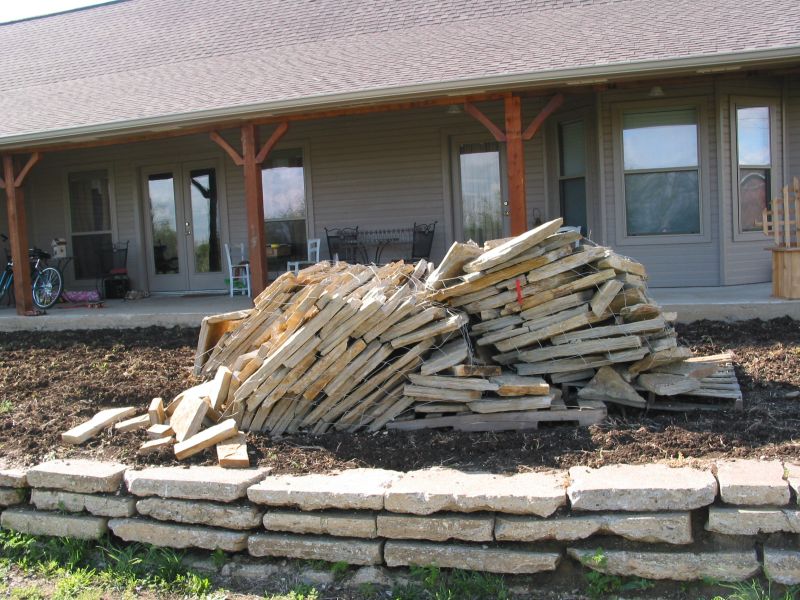
    2006 LandscapingWe finally completed this phase of the landscaping project that we started during Spring Break. We created a border around all the landscaped areas with some stone that we’d had sitting on palettes since we first moved in. We also finished planting, and put down 5 cubic yards of red mulch. This was the easy part compared to the tilling, digging, raking, hoeing, and hauling that we did previously. At some point I’ll take some photos from duplicate points of view as some shots I took when we first moved in. This will really show the difference and how much work we’ve done. There are a few photos right here, and a few more if you go to the gallery.

    Once we get a real lawn, this house will have curb appeal The entrance has really been brightened up The second newest landscaped area, along with Michelle's two new Bald Cypress trees

  • Spring Break Work

    After our fun trip, we were ready to get some work done with the remainder of our Spring Break. The goal was to extend the existing flower garden from the sidewalk all the way to the garage, and to create a new smaller flower garden on the other side of the house.

    Thursday, we went to Home Depot to rent a tiller and buy some plants, fertilizer and topsoil. Once we got that stuff home, the tilling, raking, shoveling, and hauling was to begin in earnest. Unfortunately, the tiller wouldn’t start. The engine was completely seized up. If I pulled any harder, the rope was going to break.

    After Home Depot Trip #2 to return the first tiller, the second one worked fine. Michelle and Andrew had the exhausting task of raking up the dirt and grass I was tilling and hauling it away so we could get to some grass-free dirt for the flower bed. We got lots of the work done before I tilled up a brick which bent a tine so badly, that the tiller could no longer turn. Time for Home Depot Trip #3. Michelle took mercy on me and made this trip to get yet another tiller.

    When she got this tiller home, it was well past dark, but I wanted to finish the job. Well, that wasn’t to be, because this tiller’s engine was seized up also! It was a different model from the first one so I couldn’t believe that it had the exact same problem. It looked like it was time for Home Depot Trip #4, but I ended up fixing the tiller with a HATCHET. That’s not as violent (or satisfying) as it sounds. By removing the pull rope assembly, I was able to fit the blunt end of the hatchet into a notch and finally force the engine to turn. When I finally got it started, it blew out oily smoke for several minutes. It turns out the “seized up” problem was caused by tilting the tiller to get it to fit in the back of our SUV (just like the Home Depot rental guy told us to). This made oil run into parts of the engine it wasn’t supposed to be in.

    Once the thing was running well enough to use, it was past 10. I didn’t want to disturb any neighbors too badly, so I only tilled for a little while. On Friday, I finished with the tiller and returned it to Home Depot. At that point, Michelle and I had tons of raking, hoeing and shoveling left to do. In a race to beat the coming rainstorms, we got everything planted that we wanted to, as well as completed part of a stone border that we hadn’t planned to do yet. That evening, we enjoyed some well-earned rest and relaxation, including board and DVD games with visiting friends.

    Stupidly, I didn’t take any “before” pictures of what we were working on. Soon I’ll post some “after” shots.

  • Another Skate Ramp Build

    This time some of Ace’s neighborhood pals picked up some scrap lumber from a construction site and we made another ramp: A “spine”. We did have to buy some new plywood for the actual surface of the ramp, but using the scrap certainly saved us some money. We started out with some plans from the Internet, but because we are experienced skate ramp builders now, we soon abandoned them and built the spine however we wanted to. It turned out pretty good, and the guys have been getting lots more use out of it than I expected.

    'Spine' ramp construction in progress. The new spine ramp placed near the old quarter-pipe. Ace launching over the spine.

  • Michelle’s New Stick Furniture

    Michelle's new Stick FurnitureMichelle went to the Canton Trade Days today and came back with some stick furniture made in Arkansas. I knew I shouldn’t have let her go to Canton with a friend who had a pickup. Anyway, Michelle likes it OK, and supposedly it looks rustic.

  • Patio Build

    Over the last few weeks we’ve been in the process of building a new “dry lay” patio just off of the back porch. It turned out to be double the expected cost and 10 times the expected physical labor, but since Michelle likes the finished product, it was all worth it. Click here for a construction history photo album.

    The unloaded flagstones Michelle in action: Heaving some gravel.
    Giant jigsaw puzzle starting to come together A shot of the finished product.
  • Skate Ramp Build

    Skate Ramp BuildWhat a busy weekend! Andrew, Cameron, Derek, and I built a fairly sizable skate ramp over the weekend. We’ve been wanting to do this for a while, and since my Mom was visiting, we were able to use her truck to get all the lumber we needed. This was quite a learning experience and took longer than it should have, but with this job under our belt, the next project will go much faster.

    After suffering a work stoppage because of a dead battery in our power driver/drill, we finally finished the ramp late in the evening. To our horror, it started to rain right as the last screw was tightened. That didn’t stop the boys from taking some wet, slick rides. They went back out late that night after it had dried up a bit, but the real breaking-in was the next morning when it was sunny again.

    They got brave enough to do some proper “drop-ins” from the 3-foot-high top. This project was tons of work, but it should get tons of use and end up being well worth the effort. Click the image to see a gallery of photos.

    Our ramp is a slightly modified version of the plans found here: http://www.slapmagazine.com/new_site/woodshop/quarter/index.shtml