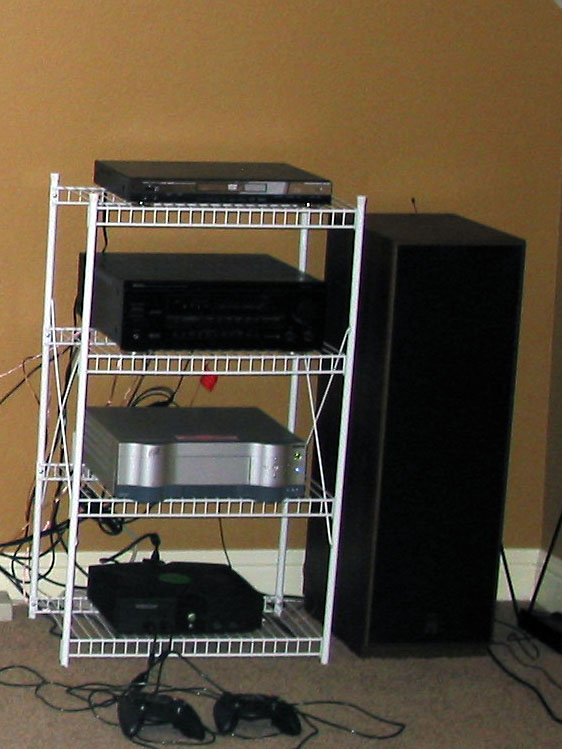
For quite some time, I’ve been wanting to build a new rack for my A/V components in the home theater. I’ve got a three-year-old photo that claims that the white wire laundry shelf I was using was “very temporary”.
After years of waiting for the proper inspiration to hit (read: “procrastination”), it finally did hit in the form of the “Flexy Rack”. I’m surprised it took me so long to come across this style of home-made racks, because once I knew what to look for, it turns out they’re super-popular. A Google search on “flexy rack” reveals that there are thousands of web pages about them. The original seems to be The TNT FleXy Table. Please note that “flexy” doesn’t mean that it twists or sways from side to side, but that the design is flexible in that it’s easy to change shelf spacing.
 Once I decided on this style, I started by drawing up simple diagrams on graph paper to make sure my equipment would fit. Next, I used a 2D drawing program to refine my dimensions further. Then I discovered Google’s free 3D drawing program “Sketchup“. It was fairly easy to learn, and soon I had created a design I liked. (Soon is a relative term. The reality is that I might have spent more time creating the 3D drawing than I spent on actual construction. If there’s any interest, I can post the Sketchup file.)
 At this point, I was ready to purchase materials. I elected to go with MDF panels because MDF is cheap, sturdy, and easy to work with. I went with 5/8″ all-thread rods. My length choices were either 3-foot or 6-foot. I wanted 4-foot. Instead of cutting 6-footers to size, I went with 3-footers and 1-footers, held together by couplers and extra nuts to lock them in place. I thought this extra hardware actually added to the overall “industrial” look. I originally bought casters that were too small, eventually returning them and getting a set of 2″ swivel casters. The full parts and price list appears below. Bottom line: I built this nice solid rack for under $150.
Now it was time to cut the MDF panels to the correct shelf sizes. I don’t have a table saw, but I have a decent saw guide that I bought for my still-on-hold arcade cabinet project. I got good straight cuts that were easy to round over with the router. I used clamps and a wood-boring bit for drilling the holes.


It had been raining for several days and was extremely humid when I was ready to paint the shelves, so I ended up painting in the dining room over a plastic tarp. I used one coat of Kilz primer, and two coats of black semi-gloss paint. Michelle complained of headaches from the fumes, and they were bad: At one point I couldn’t remember my A-B-C’s.


After the paint dried, I used a counter-sink bit to drill the holes for installing the swivel casters. (Man I wish I had drilled these holes before painting!) Once this was complete, I was ready to start putting it all together. I don’t know how many revolutions it required to spin all 56 hex nuts into the correct positions on the all-thread rods, but my fingers sure got a workout. The pattern of nut-washer-shelf-washer-nut became second-nature after a while.


After leveling all the shelves (with a couple of nut-turns: this shelf is flexible, Man!), and tightening everything down, it was time to install the A/V equipment and call this project done. Here’s a comparison of the Sketchup rendering and the real deal, and a comparison of the old wire rack and the newly completed and populated flexy-rack.


Funny that I just noticed that every piece of equipment except the Dish 921 PVR has been updated since the wire-rack photo was taken.
Full photo gallery here.
Things I would have done differently:
- Used a drill press to line up all holes perfectly. During final assembly, it became evident that my hand drilling had resulted in holes that were at a slight angle. This made it difficult to line up the top two shelves with the rods.
- Skipped the primer or tinted it dark. Any chip of the black paint results in the white primer showing through.
- Drilled the counter-sink holes before painting. Doing this after painting meant that it was harder to do a clean job, and then I had to touch it up afterwards.
Full parts list (from Home Depot, Lowes, Ace Hardware):
| Count |
Item |
Cost |
| 2 |
3/4″ x 24″ x 49″ MDF Panels |
$17.78 |
| 4 |
5/8″ by 3 foot All-Thread Rod |
$27.76 |
| 4 |
5/8″ by 1 foot All-Thread Rod |
$9.12 |
| 4 |
5/8″ Coupling Nut |
$11.48 |
| 50 |
Hex Nuts |
$12.50 |
| 6 |
More Hex Nuts |
$1.50 |
| 50 |
Flat Washers |
$13.00 |
| 1 |
Quart of Kilz Primer |
$5.48 |
| 1 |
Quart of Black Semi-gloss |
$7.87 |
| 4 |
2″ Swivel Casters |
$10.00 |
| 16 |
Machine Head Bolts |
$2.56 |
| 16 |
Nuts |
$2.72 |
| 16 |
Lock Washers |
$2.40 |
| |
Tax |
$9.74 |
| |
Total |
$133.91 |
 Michelle, Andrew, Holly and I enjoyed a 5-day, 5-night cruise on the Carnival Triumph. Joining us was Holly’s boyfriend, Drey. We visited Progreso and Cozumel, Mexico. Our off-ship excursions included Mayan ruins, a beach-side resort, and an Amazing Race in Cozumel where we ran about 4 miles through the city, solving clues and having fun. The teenagers got in the ocean, but Michelle and I stayed dry. We also enjoyed the on-ship amenities, being quickly spoiled with food and service. I personally ate more ice cream in that 5-day period than any other 5-month period of my life. Michelle is already planning another cruise.